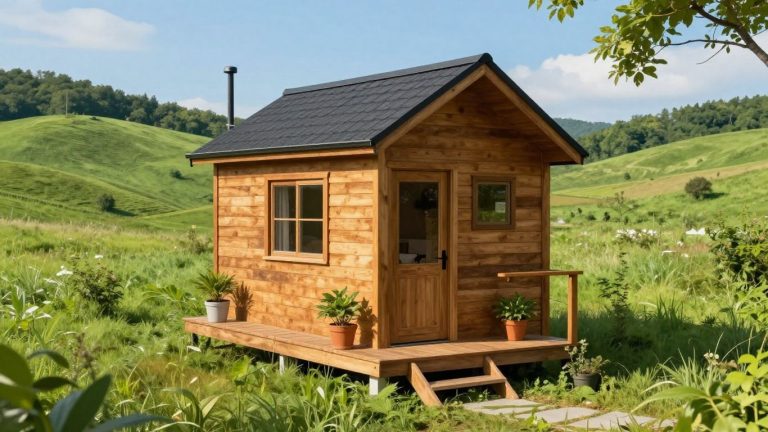
Shed to Tiny House Conversion How to Do It Right

You're staring at a backyard shed, a land listing, or a driveway quote and wondering if this is the affordable way into a tiny house, or just the cheapest way to buy a new pile of problems. That's the core decision behind a shed to tiny house conversion. The shell can save money, but only when it fits the site, the code path, and the kind of living you want.
A lot of people start with the bargain headline and end up surprised by the hidden work. A storage shed is built to keep tools dry, not to act like a dwelling that needs structure, insulation, ventilation, plumbing, electrical, and inspection-friendly details. If you choose well, the shed can be a smart head start. If you choose badly, it becomes an expensive way to learn what should have been checked before delivery.
Is a Shed the Right Starting Point for Your Tiny House
A buyer usually gets pulled in by one simple idea. A shed looks available, it looks faster than framing from scratch, and it feels like a shortcut to a small home. That's exactly why the first decision isn't about paint colors or cabinets, it's about whether the shell is the right foundation for the kind of dwelling you need.
Take a common backyard scenario. Someone wants a small studio behind a main house, or they're looking at land where a compact dwelling could work as an ADU later. They compare a shed shell, a code-ready shell, and a small manufactured unit, then realize the cheapest sticker price doesn't tell them much about permitting, comfort, or resale. A shed conversion can make sense, but only when the shell's starting point lines up with the legal and practical finish line.

What a shed is built to do, and what a dwelling must do
A standard storage shed is usually optimized for simple enclosure, not continuous occupancy. It doesn't automatically give you the wall depth, energy performance, moisture control, or utility readiness a home needs. That gap is where cost shows up.
The most useful mental shift is to stop asking, “Can I live in it?” and start asking, “What has to change before an inspector, insurer, and future occupant can treat it like a residence?” For many buyers, that means the shed is only the shell, not the project. In practical terms, it's the difference between buying a box and buying a building.
Practical rule: If the shed only looks cheap before permits and utilities, it isn't really cheap yet.
That's why the search should begin with use case. A weekend retreat, a backyard office, a guest unit, and a primary residence all have different tolerance for compromise. For a primary residence, comfort and code compliance matter more, and the conversion tends to become more involved. For an ADU, zoning and site fit can matter just as much as the framing itself.
A good comparison point is your local tiny house options page, especially if you're weighing the lifestyle trade-offs against other small-home paths, like the overview at Tiny Home State's tiny house pros and cons guide. You're not just buying square footage, you're buying a path to approval and daily livability. If the shell doesn't support that path, another starting point may be cleaner.
How to Assess Shed Suitability and Site Readiness
A shed can look fine from the road and still fail as a dwelling shell. Before money goes into finishes, the structure, the site, and the utility path all need to line up. Many budgets go off course because the buyer keeps improving the interior while the core problems stay in the framing, drainage, or placement.
The fastest way to avoid that trap is to inspect the shed as if you will have to defend it to a building official later. Check the floor first. Stand near the perimeter, then near the center, and push firmly with your foot or hand. A little give is normal in some light structures, but if the floor feels bouncy, or you can see more than about ¼ inch of deflection when you load it, plan on reinforcement. Look at the framing for undersized members, loose connections, and any sign the shed was built for storage only. Then move outside and examine the roof edge, the ridge line, and the soffits from the ground or from a safe distance with binoculars or a camera zoom. Look for waviness, patched spots, stained trim, or dark streaks that suggest the roof has already dealt with moisture. Many sheds are built with lighter framing and need upgrades such as 2×4 construction, insulated windows and doors, and house wrap to better align with residential expectations, as noted by Alan's Factory Outlet.
Structural red flags and green lights
Start with the frame. Look for straight walls, tight joints, and a floor that does not feel springy under load. A shed shell that racks when you push on a wall, has visible sag in the roof, or shows repeated patching is already telling you something. Once you add people, furniture, appliances, and possibly plumbing loads, weak framing turns into a real repair bill.
Openings matter too. Doors and windows are not just about light, they affect insulation, emergency exit planning, and how the finished interior will feel. If the shell has tiny or poorly placed openings, you may end up fighting the layout from the start. A wall that needs to become a legal bedroom wall, kitchen wall, or bath wall can be expensive to rework after the fact.
A shell that looks “good enough” for storage can still be a bad bet for sleeping, cooking, and bathing every day.
The site deserves the same attention. You need access for delivery, utility routing, and future maintenance. You also need to know whether the ground drains properly, whether frost or wind exposure changes the foundation approach, and whether setbacks leave enough room for the building to sit legally. If the site is awkward, every trade that follows becomes harder and more expensive.
For readers still in the land search phase, this land-buying guide for tiny homes is the right companion piece. Land can be the hidden deal-breaker in a shed conversion, especially if a parcel looks affordable but cannot support the use you want. A good shed on a bad site is still a bad project.
Questions to ask before you buy
Ask the seller how the shed was built, what framing size was used, whether there is a known moisture history, and how the floor is supported. Ask whether the unit was set on blocks, a slab, skids, or another foundation approach. Then ask how the structure was used, because a shed that sat closed up and damp for years may carry hidden issues even if it looks clean.
Document everything you can with photos and notes before purchase. If you later need to speak with a contractor or inspector, those records help separate a promising shell from a money pit. Ask direct questions and watch the answers. If they stay vague, walk away. In a shed to tiny house conversion, uncertainty is usually a warning, not a bargain.
Strengthening Structure Envelope and Interior Layout
The physical build should happen in a sequence, not as a scramble of upgrades. First the structure, then the envelope, then the interior layout. That order matters because a finished wall is expensive to open back up, and every hidden defect becomes more costly once drywall, trim, and cabinets are in place.
Fix the shell before dressing it up
If the floor needs strengthening, address it before anything else. A dwelling carries people, furniture, appliances, and sometimes plumbing loads that a storage shed never had to think about. The same is true of walls and roof framing. If they aren't suited to residential use, the job becomes a retrofit, not a simple finish-out.
The envelope comes next. House wrap, weather-tight flashing, and properly sized openings help control water and air movement before insulation goes in. Shed conversions differ from decorative backyard studios. A dwelling has to breathe in a controlled way, not leak air randomly through seams and trim joints.
Once the shell is corrected, insulation and moisture control can do real work. The exact assembly depends on the structure, but the goal is consistent, a dry, durable wall and roof system that doesn't trap condensation where you can't see it. That's especially important in a small home, because every comfort problem shows up faster in a tight footprint.
Rule of thumb: Don't hide structural uncertainty behind finish materials. Solve the shell first, or you'll pay for it twice.
Plan the interior around daily use, not just available floor space
The fastest way to waste a tiny layout is to treat the room like a miniature house instead of a highly edited one. The sleeping area needs privacy and usable circulation. The kitchen needs workable counter runs and a place for refrigeration, prep, and cleanup. The bathroom needs enough room for fixtures, movement, and service access. Storage has to be built into the plan, not patched on after the fact.
Natural light changes how a tiny home feels, but it also affects how the space functions. Put openings where they support the plan, not where they merely look balanced from outside. If a loft is part of the design, make sure the access doesn't steal all the usable floor area below it. If the home is single-level, keep the plan honest about furniture clearances and door swings.
A compact layout can feel generous when the envelope is strong and the furniture placement is disciplined. It can feel cramped when the structure is weak and the layout is fighting the shell. That's why the most successful conversions usually feel calm, not crowded. Every inch has a job.
Planning Plumbing Electrical HVAC and Ventilation Systems
Small homes punish disconnected planning. Plumbing, electrical, HVAC, and ventilation all interact, and if one is treated as an afterthought, the others get harder to install and harder to inspect. In a shed conversion, the cleanest approach is to design the systems as one coordinated package, not as separate trades thrown at a finished shell.
Start with the load and the route
Electrical design should begin with the loads you expect to use. Lighting, outlets, appliances, water heating, and climate control all need a place in the plan before walls close up. The panel location, circuit paths, and outlet placement should follow the layout, not fight it. Thin walls and compact floor systems make sloppy routing obvious fast.
Plumbing works the same way. Keep fixtures close together when possible so the runs stay simpler and the system is easier to service later. Long, awkward paths through a tiny building usually create more problems than they solve. Drainage, venting, freeze protection, and access for repair all matter more than trying to hide every pipe.
For anyone considering temporary or auxiliary waste handling while the site is being sorted out, this grey-water tank resource is worth a look. It can help frame the difference between a short-term site strategy and a final dwelling setup. Just remember that a temporary solution doesn't replace a code-compliant permanent plan.
Heating, cooling, and fresh air need to work together
A tight shell can become uncomfortable quickly if HVAC and ventilation are treated like separate chores. Once insulation and air sealing improve the envelope, the building also needs managed fresh air and moisture control. Otherwise, the same improvements that make the home efficient can make it feel stale or damp.
Pick equipment for the actual size and load of the finished space, not for what would go in a larger house. Oversized systems cycle poorly and can leave humidity control weak. In tiny homes, comfort usually comes from right-sizing and good distribution, not brute force.
The sequence matters in the field as much as on paper:
- Map loads early. Know where the heavy users will sit, including cooking, laundry, water heating, and climate control.
- Decide service paths before finish work. Pipes, wire, and duct or line-set routing should be visible on the plan long before trim goes in.
- Protect the envelope. Every penetration through the shell should be intentional, sealed, and accessible enough to inspect later.
That sounds basic, but it's exactly where many conversions slip. Builders get excited about finishes, then discover the work was always hidden in the systems. If you get the sequence right, the finished home is quieter, safer, and easier to maintain.
Navigating Permits Zoning Inspections and Insurance
A shed conversion can look ready for finish work and still get stopped at the counter if the legal path was never mapped. That is the point where a lot of projects stall, not because the shell cannot be improved, but because zoning, building, and insurance questions show up after the work is already under way. If the goal is a recognized dwelling, the paperwork has to match the physical build from the start.
Alan's Factory Outlet outlines that permit approval is required and that zoning code and building code review are both typically involved when a shed is being turned into a recognized tiny house or ADU. That matches what happens on real jobs, because the review changes once the structure is intended for sleeping and daily living. A shed used for storage is often judged under a very different standard than a shed used as a residence.

What officials and insurers are really looking for
Inspectors usually want to know whether the structure is safe, whether the openings are adequate, whether the systems are installed correctly, and whether the use matches local rules. Finish quality matters less than the parts that make the building behave like a dwelling. Framing, egress, energy performance, and service installation usually get the closest look.
Insurers and lenders look at the same project through another lens. They want clarity around use, permanence, and risk. If the home is still described as an outbuilding while it is being used as a residence, the paper trail can work against you later. The legal designation needs to be resolved early, not after move-in.
Don't wait until the interior is done to ask what documents your local office will want. The best time to ask is before the shell is placed.
A careful pre-check should cover zoning allowances, setback rules, utility expectations, and whether the project will be handled as an ADU, a tiny house, or another residential classification in that jurisdiction. If drawings are required, they should reflect the actual final use, not a loose sketch. A cleaner plan set usually means fewer handoffs between departments and fewer delays from missing information.
How to keep the approval path moving
Start a documentation file from day one. Keep purchase paperwork, site photos, floor plans, product specs, and notes from permit conversations in one place. If the building is inspected in stages, label the photos by stage so you can show what was inside the walls before they were closed up.
When the local office has specific forms or a preferred review order, follow that sequence exactly. A lot of unnecessary delay comes from submitting a partial package and hoping someone else will fill in the blanks. That is not how most jurisdictions want a tiny housing project handled.
Bring in a pro when the project moves into structural correction, utility design, or a use classification you have not handled before. A good designer, builder, or permit helper can spot documentation gaps that homeowners often miss. The goal is not to make the project more complicated. It is to make the finished building legal, insurable, and usable the way you planned.
Budget Timeline and Your Path to a Finished Tiny House
Money and time make more sense once the scope is honest. The shell is only one part of the project, and the budget pressure usually comes from utilities, finish quality, and the labor needed to make the structure behave like a dwelling. That's why two shed conversions with the same footprint can feel like entirely different projects.
One independent industry source estimates total conversion costs at $25,000 to $80,000 all-in, including the shed itself, with the shed shell typically costing $8,000 to $25,000 and the conversion work adding $15,000 to $55,000 in materials plus 300 to 600 hours of labor, according to Tiny Home Shop. That spread tells you something important. The shell matters, but the conversion work and labor model usually drive the outcome.
Cost drivers that change the math
A shed shell only saves money when it meaningfully reduces the amount of new structure you have to build. If the shell is already close to residential expectations, the savings are real. If the shell needs major framing correction, envelope upgrades, utility routing, and permit-ready documentation, the advantage shrinks fast.
DIY usually saves on labor, but it shifts risk onto the owner. A turnkey build costs more because the trade coordination, sequencing, and inspection management are already embedded in the price. That difference isn't just about convenience. It affects how quickly the home becomes livable and how many mistakes have to be fixed after the fact.
Shed to Tiny House Conversion Cost and Effort Snapshot
| Cost Component | Typical Range | What Drives Variation |
|---|---|---|
| Shed shell | $8,000 to $25,000 | Size, framing quality, delivery, opening package |
| Conversion work | $15,000 to $55,000 | Insulation, interior finish level, utility complexity, labor model |
| Total project | $25,000 to $80,000 all-in | Code path, site work, utility connections, finish standards |
| Labor | 300 to 600 hours | DIY skill, inspection readiness, coordination with trades |
A budget that ignores utility connections and interior systems usually underestimates the final spend. A budget that starts with the shell and ends with occupancy paperwork is much more reliable. That's the difference between a project that stalls halfway and a project that reaches move-in.
The cheapest shed isn't the winner. The shell that gets you to approval with the least rework usually is.
A realistic build sequence
Start by locking the site and legal path before committing to finishes. Then confirm the shell, then the structure, then the envelope, then the systems, then the interior. If you're hiring out parts of the work, schedule the trades in that order so the walls aren't sealed before rough-ins are complete.
Your final punch list should be boring, and that's a good thing. Test every fixture, inspect every visible penetration, verify every door and window operates correctly, and confirm the paperwork is complete before move-in. A shed to tiny house conversion works best when the owner stays disciplined about sequence and stops treating the shell as a shortcut. If you want help mapping the next move, use Tiny Home State's practical guides to compare land, code, and small-home options before you spend another dollar.
Explore more tiny home living, design, downsizing, building, and lifestyle resources.
- EcoFlow Delta 3 Pro vs Jackery Explorer 5000 Plus Compared
- Modern Tiny Living: Complete Small-Space Design Guide
- 8 Smart Tiny House Bathroom Ideas for 2026
- Tiny Homes for Rent in Wyoming: Wild West Getaways to Book
- Tiny Homes for Rent in Washington: Forest Escapes & Cozy Stays
- Tiny Homes for Rent in Utah: Red Rock Retreats to Book