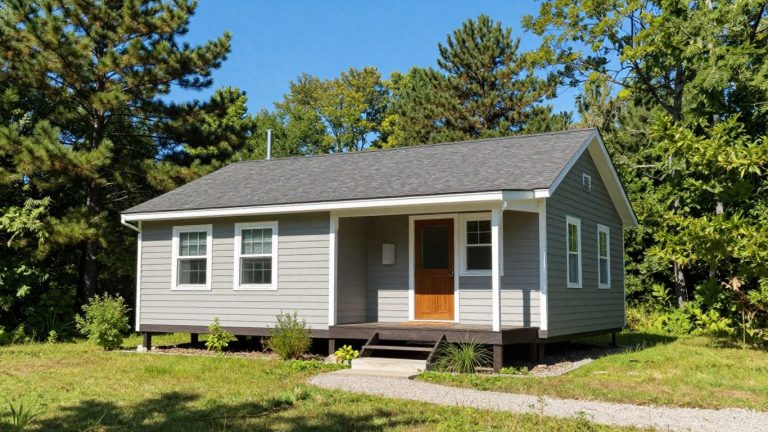
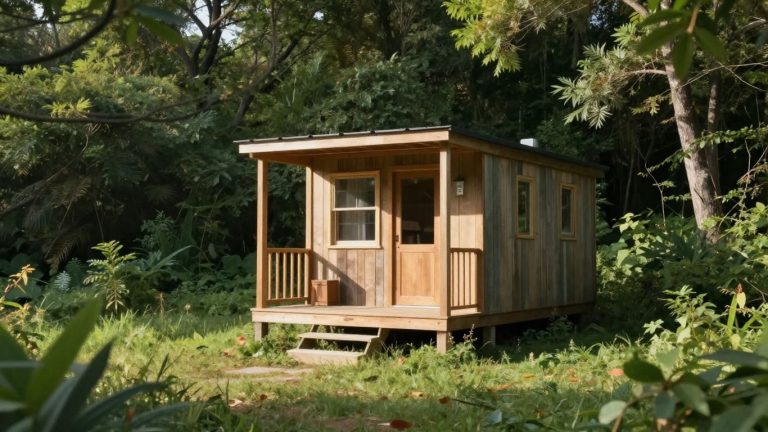
Your Guide to Designing the Perfect 12×32 Tiny House

When you picture a tiny house, what comes to mind? For many, it's a tight, compromised space. But the 12×32 model changes that entire perception. At 384 square feet, it hits a real sweet spot, offering just enough room to feel like a proper home without the baggage of a larger, more expensive build.
This isn't just another small box. It’s the perfect canvas for a roomy one-bedroom retreat, a high-end guesthouse, or even a seriously impressive backyard office. You get the minimalist ethos without sacrificing genuine comfort.
What to Expect from a 12×32 Tiny House
The 12×32 tiny house is where compact living truly becomes livable. Moving up to this size from a smaller model feels like upgrading from a studio to a one-bedroom apartment—the difference is night and day. That extra space fundamentally changes how you can design your life inside.
With 384 square feet to play with, you’re no longer forced to have your kitchen, living room, and bedroom all bleed into one another. You can actually create distinct zones. We're talking about a floor plan with a private bedroom (with a door!), a comfortable living area, and a kitchen that you can actually cook in. This separation is what makes a tiny house feel less like a camper and more like a true home.
Why This Size Is So Popular
The reason so many people land on the 12×32 dimension is its incredible versatility. It’s large enough for a single person or a couple to live in full-time, but still compact enough to work beautifully as an Accessory Dwelling Unit (ADU), a weekend cabin, or a lucrative rental property. That adaptability makes it a sound investment.
This size also sits comfortably under the widely accepted 400-square-foot threshold that defines a tiny home. This is more than just a number; it means a 12×32 build often qualifies for placement in tiny house communities and falls under specific zoning rules that can make life much easier. The tiny home market has exploded, and as you can see from market growth data on platforms like Today's Homeowner, this size is right at the heart of it.
The real magic of the 12×32 isn't just having more space—it’s having smarter space. The dimensions unlock design possibilities that dramatically improve privacy, function, and your day-to-day quality of life.
A Quick Overview
Before we dive deep into floor plans and building strategies, let's get a bird's-eye view of what a 12×32 tiny house looks like on paper. This table breaks down the core specs.
12×32 Tiny House at a Glance
| Attribute | Specification / Detail |
|---|---|
| Total Square Footage | 384 sq. ft. |
| Typical Layouts | 1-bedroom, 1-bath; open studio with loft; 1-bed with office nook |
| Best Use Cases | Primary residence for 1-2 people, guest house, ADU, home office |
| Average DIY Cost | $35,000 – $70,000 |
| Average Prefab Cost | $60,000 – $120,000+ |
| Foundation Type | Can be built on a permanent foundation (slab, pier) or on wheels (THOW) |
| Key Advantage | Balances spaciousness with affordability and manageable construction |
Think of this table as your starting point. Now, let’s get into the details of how to bring a space like this to life.
Diving Into 12×32 Tiny House Floor Plans
Choosing a floor plan is hands-down the biggest decision you'll make for your 12×32 tiny house. This isn't just about lines on paper; it's the very blueprint for your life within those walls, shaping how you'll cook, sleep, work, and unwind. With a 384-square-foot canvas, a brilliant layout can make your home feel surprisingly open and effortless, while a poorly planned one will feel like a constant, frustrating puzzle.
Before you get attached to any specific design, take a hard look at your own lifestyle. Are you a remote worker who desperately needs a dedicated office nook? A couple that values a private bedroom? Or maybe you love to entertain and want a wide-open living area for guests. You have to map out your daily routines and what you absolutely can't live without. This is what makes the plan work for you, not the other way around.
This visual gives you a quick snapshot of the size, cost considerations, and common uses for a 12×32 footprint.

You can see how the size directly impacts what you can do with the space and what it might cost to build.
The Spacious One-Bedroom Layout
If you’re a couple or just someone who craves a bit of privacy, the one-bedroom layout is a fantastic choice for a 12×32 tiny home. This plan carves out a dedicated space—usually at one end of the structure—for a fully enclosed bedroom with a proper door. That separation is a true game-changer for daily living, giving you a quiet retreat from the main hustle and bustle of the home.
The secret to making this layout work is all about traffic flow. You need to be able to walk from the front door to the kitchen, living area, and bedroom without bumping into furniture or squeezing through awkward gaps. Imagine a clear path along one wall that connects everything smoothly; it’s the difference between a functional home and a daily obstacle course.
To really open up the space, these layouts often incorporate a few key tricks:
- An open-concept kitchen and living room at the end opposite the bedroom.
- Plenty of large windows on the long walls to drench the main area in sunlight.
- Pocket or barn doors for the bedroom and bathroom, which save precious floor space compared to a traditional swinging door.
The Loft Design: Thinking Vertically
When you can’t build out, you build up. The loft is a classic tiny house move for a reason—it’s an ingenious way to add a ton of usable space without making the footprint any bigger. In a 12×32 home, a loft can free up the entire main floor, making the living area feel incredibly open and expansive.
A loft is all about reclaiming that empty vertical space. It turns the air above your head into a functional sleeping area or a cozy reading spot, essentially giving you a mini second story.
This strategy is perfect for anyone comfortable climbing a ladder or a set of compact stairs. With the bed moved upstairs, the main floor suddenly has room for a bigger kitchen, a more comfortable sofa, or even a real dining table. You get a clear separation between sleeping and living zones, even without a physical wall downstairs.
The Two-Room Flex-Space Plan
But what if you need more than just a bedroom? Enter the two-room or "flex-space" layout, which cleverly divides the private portion of the home into two smaller, distinct rooms. This approach is incredibly versatile and can be tailored to a wide range of needs.
For example, one room can be a modest bedroom, while the second becomes:
- A Home Office: An absolute must for remote workers who need to focus without distractions.
- A Creative Studio: The perfect spot for painting, music, or crafting.
- A Guest Room: A small but private and welcoming space for visitors.
- A Walk-in Closet: A touch of luxury that keeps clutter completely out of sight.
This layout demands careful planning to avoid feeling cramped or boxed in. Using glass-paneled doors, or even a partial wall, can create the necessary separation while still letting light pass between the spaces. Sure, the rooms will be small, but their dedicated purpose is often far more valuable than a slightly larger, undefined space. If you're looking for more creative ways to divide your space, checking out different DIY tiny house plans can be a great source of inspiration.
Making 384 Square Feet Feel Spacious
A great floor plan is the blueprint, but bringing a 12×32 tiny house to life is all about mastering the interior. It’s one thing to fit everything into 384 square feet; it’s another thing entirely to make that space feel open, functional, and genuinely comfortable. This isn’t just about buying smaller furniture—it’s about a total shift in how you think about design.
Think of it like being the captain of a well-outfitted ship. Every inch has a purpose, and many things have to do double or triple duty. With a bit of smart planning, your compact home can feel surprisingly expansive.

The Power of Multi-Functional Furniture
In a tiny home, furniture that only serves one purpose is a waste of precious real estate. The golden rule is to demand more from every piece you own. Your furniture needs to work as hard as you do, transforming to meet different needs throughout the day.
That beautiful ottoman in your living area? It’s not just a footrest. It’s also where you store blankets and board games. Your coffee table should have a lift-top, easily converting into a dining surface or a perfect-height desk. This is how you make a single room serve the functions of three without adding an inch of floor space.
A few non-negotiable, multi-functional pieces include:
- Sofa Beds or Futons: The quintessential space-saver. Modern versions have come a long way, offering genuine comfort for sitting and a decent night's sleep for guests.
- Expandable Dining Tables: Look for console tables that fold out to seat a group, or round tables with leaves that pop up when you need them.
- Storage Beds: A bed with drawers underneath or a hydraulic lift that reveals a huge storage cavity is an absolute game-changer. This is the perfect spot for clothes, linens, and shoes.
Unlocking Vertical and Hidden Storage
When you can’t build out, you have to build up. The vertical space on your walls is some of the most valuable, and most often overlooked, storage area in a tiny house. The same goes for all the little nooks and crannies hidden within the home's structure.
In a tiny house, walls aren't just for pictures; they are storage systems waiting to be activated. Every unused corner and "in-between" space is an opportunity to reduce clutter.
Floor-to-ceiling shelving is a classic for a reason. It gives you a ton of space for books, baskets, and personal items, but it also has the added benefit of drawing the eye upward, which makes the room feel taller. But don't stop there. Get creative and find storage in these unexpected places:
- Toe-Kick Drawers: That dead space under your kitchen and bathroom cabinets is perfect for shallow drawers. Use them for baking sheets, cleaning supplies, or pull-out pet bowls.
- Staircase Storage: If you have loft stairs, they absolutely must double as storage. Each step can be a drawer or a small cabinet, turning the entire staircase into a functional piece of furniture.
- Under-Floor Compartments: Some of the most clever designs include hidden hatches in the floor. This is ideal for stashing things you don't need often, like seasonal gear or bulk pantry items.
Our complete guide to tiny home storage solutions offers even more brilliant ideas for maximizing your space.
The Psychology of Light and Reflection
It’s not all about physical storage. You can make a room feel dramatically larger using a few simple interior design tricks that play on perception. The human brain naturally associates bright, light-filled environments with openness.
Start with your color palette. Lighter colors are your best friend. Soft whites, pale grays, and light, airy pastels are fantastic because they reflect light and make walls feel like they’re further away. If you can, use one continuous light color throughout the main living space to blur the lines between different zones.
Mirrors are your secret weapon. A large mirror can visually double the size of a room by creating an illusion of depth. The best trick in the book is to place a mirror directly across from a window—it bounces natural light all over the room and brings a feeling of the outdoors inside. Finally, layer your lighting. You need a mix of ambient overhead light, focused task lighting for cooking and reading, and accent lights to add warmth and prevent the space from feeling flat at night.
How to Budget Your Tiny House Build
Alright, let's get down to the most critical part of your tiny house dream: the budget. More than any other step, your financial plan will shape everything about your 12×32 tiny house, from the way it's built to the final coat of paint. A solid budget is what separates a smooth, exciting build from a project that grinds to a halt under the weight of surprise costs.
The best way to tackle this is to break the total cost into four distinct categories. I like to think of them as four big buckets you need to fill: the shell, the interior finishes, the utilities, and finally, the appliances. Each one is essential for turning a basic structure into a comfortable, functional home.
Breaking Down Core Construction Costs
Your biggest upfront cost will almost always be the shell. This is the skeleton and skin of your home—the trailer or foundation, framing, roofing, siding, and all your windows and doors. It's the part of the build that makes your home secure and weathertight, and for a 12×32 tiny house, it can easily account for 40-50% of your entire budget.
Next up are the interior finishes, which is where your home’s personality really starts to shine through. This bucket covers everything from insulation and drywall to flooring, paint, and cabinetry. Your material choices here have a massive impact on the final look and feel of your space, not to mention the cost.
Finally, you have the systems that make it all work: utilities and appliances. This is the functional heart of your tiny house, including all the plumbing, electrical wiring, and your HVAC system (like a mini-split). It also covers the appliances that make a house a home—the refrigerator, cooktop, water heater, and more.
DIY vs. Turnkey Prefab
One of the most significant forks in the road for your budget is deciding whether to build it yourself or buy a pre-built model. A full DIY build offers incredible freedom for customization and can save you a serious amount of money—if you have the time and the skills. You're in complete control of every purchase.
On the other hand, buying a turnkey prefab home is all about convenience and cost certainty. The price is fixed, you skip the headaches of managing a construction project, and your home arrives ready for utility hookups. It's more expensive, but it offers a much faster and more predictable path to tiny living.
The decision between DIY and prefab often comes down to a trade-off: Are you saving money with your own labor, or are you saving time and stress by paying a professional? There's no wrong answer, but you must be realistic about your skills, time, and budget.
The Impact of Material Choices
Your budget can swing wildly based on the materials you choose. For every single component of your 12×32 tiny house, there's a spectrum of options from budget-friendly to downright luxurious. Something as simple as flooring can mean the difference of thousands of dollars—just compare affordable laminate planks to reclaimed wide-plank hardwood.
To give you a clearer picture, I've put together a table that shows how these choices play out across different parts of the build.
Material Cost Comparison for a 12×32 Tiny House
| Component | Budget-Friendly Option | Mid-Range Option | Premium Option |
|---|---|---|---|
| Siding | Vinyl or T1-11 Plywood | Standard Cedar or HardiePlank | Shou Sugi Ban or Metal Siding |
| Roofing | Standard Asphalt Shingles | Corrugated Metal | Standing Seam Metal |
| Windows | Single-Pane Vinyl | Double-Pane Vinyl | Triple-Pane, Wood-Clad |
| Flooring | Laminate or Vinyl Plank | Engineered Hardwood | Reclaimed or Solid Hardwood |
| Countertops | Laminate | Butcher Block or Solid Surface | Quartz or Granite |
| Insulation | Fiberglass Batts | Rockwool or Spray Foam (closed) | Cork or Sheep's Wool |
As you can see, mixing and matching these options gives you a ton of control. You might splurge on high-efficiency windows but save money with a more practical countertop. It's all about finding the right balance for your priorities and your wallet.
Uncovering the Hidden Costs
A smart budget is one that accounts for all the things that aren't physically part of the house. These "hidden costs" are what I see trip people up most often, and they can derail an otherwise well-planned project.
Be sure you set money aside for these common oversights:
- Permits and Fees: Your local government will likely require building, electrical, and plumbing permits, and each one comes with a fee.
- Site Preparation: This could be as simple as a gravel pad or as involved as clearing land and pouring a concrete foundation.
- Transportation: If you buy a prefab tiny house, getting it delivered to your site can cost several thousand dollars, depending on the distance.
- Utility Hookups: The expense of connecting your home to the electrical grid, water lines, and a sewer or septic system can be substantial.
The good news is that tiny living is proving to be a legitimate path to financial freedom. With the average cost of a self-built tiny home falling between $30,000 and $60,000, it's a much more achievable goal than a traditional mortgage. An impressive 68% of tiny homeowners are completely mortgage-free, and building a 12×32 tiny house for around $37,000 makes that a very real possibility. You can see how others are achieving this by checking out this video on the journey to mortgage-free tiny living on YouTube.
By carefully planning for every category—from the shell to the hidden fees—you can create a realistic budget that sets your project up for success. To dive deeper into financial planning, check out our complete guide on the cost of building a tiny house.
Sorting Through Building Codes and Regulations
So, you've got the vision for your 12×32 tiny house—the layout, the finishes, the whole dream. Now comes the part that can feel a bit daunting: the rules. Jumping from dream to reality means working through a tangle of building codes and local ordinances.
It might seem like a lot of red tape, but trust me, getting this right from the start is the most important step you'll take. Think of it as setting the foundation. A little due diligence now saves you from massive headaches, legal trouble, and unexpected costs later on.
Before you buy a single 2×4, you need to understand the two main legal paths your tiny house can take. This single decision will dictate almost everything that follows.
THOW vs. ADU: The First Big Decision
The first fork in the road is a big one: will your home be built on a permanent foundation, or will it be built on a trailer with wheels? This choice completely changes the game in terms of where you can legally live and which rulebook you need to follow.
A Tiny House on Wheels (THOW) is usually classified as a recreational vehicle (RV). This can be a huge plus, giving you the freedom to move and often letting you sidestep some of the more rigid residential building codes. The catch? You might be limited to RV parks or specific zones, and finding a legal spot for long-term living can be a real gray area in many towns.
On the other hand, a 12×32 tiny house on a permanent foundation (like a concrete slab or piers) is typically seen as an Accessory Dwelling Unit (ADU). This is especially true if it's on a property that already has a main house. ADUs are governed by local residential codes, which are definitely stricter but offer a clear, legal path to putting down permanent roots.
Here's the bottom line: your local officials see a THOW as a vehicle, but they see an ADU as a home. That distinction is everything.
Finding a Tiny-Friendly Place to Land
Zoning laws are the local rules that control what can be built and where. For many people hoping to go tiny, these ordinances are the biggest hurdle. Some communities are incredibly progressive and have already created clear rules for tiny homes, but many others are still playing catch-up.
Your first stop should always be your local planning or zoning department. Don't be shy—get on the phone or check their website and ask direct questions.
- ADU Rules: What are the town's regulations for Accessory Dwelling Units? Be specific about size limits, property line setbacks, and parking requirements.
- THOW Parking: Is it legal to live in a THOW on private residential property? If so, for how long and what are the conditions (like utility hookups)?
- Minimum Home Size: Does the county enforce a minimum square footage for a new house? This is a common rule that can trip up tiny builds.
Seeking out a "tiny-friendly" town or county can make your life infinitely easier. These are places that have already done the hard work of updating their codes, recognizing that smaller homes are a smart solution for modern housing needs.
The Building Standards That Matter
Once you know whether you're building a THOW or an ADU, you can zero in on the specific building standards you'll need to meet. These codes aren't just bureaucracy; they exist to make sure your home is safe, structurally sound, and won't cost a fortune to heat and cool.
For a tiny house on a foundation, the gold standard is the International Residential Code (IRC). Many forward-thinking areas have adopted IRC Appendix Q, a game-changer that provides specific guidelines for homes under 400 square feet. It covers non-negotiable safety items like emergency egress windows, proper stairs or ladders for lofts, and minimum ceiling heights. Building to these standards is almost always required to get your permits and, just as importantly, to get your home insured.
For a THOW, the picture is a bit different. While it's not always a legal mandate, smart builders voluntarily follow standards from the Recreational Vehicle Industry Association (RVIA) or the National Fire Protection Association (NFPA) 1192. Having one of these certifications can make it much easier to get a loan, find insurance, and secure a spot in a high-quality RV park.
Certified or not, you absolutely must ensure the house is anchored securely to its trailer. That connection is what keeps everything together on the highway. Building a 12×32 tiny house is well within reach, but a successful project starts with research and a solid commitment to doing things the right—and legal—way.
Your Essential 12×32 Tiny House Project Checklist
The dream of building a 12×32 tiny house is incredibly exciting. But let's be honest, the journey from a vision in your head to a home you can stand in depends entirely on organization.
This checklist is your roadmap. It breaks down the entire process into five manageable phases to keep you on track, help you sidestep common mistakes, and ensure no critical detail is missed. Print it out, use it, and check things off—this is how your dream becomes a reality.

Phase 1: Planning and Design
This is the foundation of your entire project, where your ideas start to take shape on paper. Getting this right makes every subsequent step smoother.
- Define Your Non-Negotiables: Before looking at a single floor plan, list your absolute must-haves. Is it a real bathtub? A dedicated home office? A ground-floor bedroom? Know what you can't live without.
- Finalize Your Floor Plan: Now, match your list to a layout. Choose the plan that best fits your lifestyle, whether it’s a wide-open studio or a more traditional one-bedroom with a loft.
- Select a Build Method: How hands-on do you want to be? Decide if you're tackling a full DIY build, buying a pre-built shell to finish yourself, or investing in a turnkey, move-in-ready home.
Phase 2: Budgeting and Financing
With a solid plan, it’s time to get real about the numbers. A clear, honest budget is the single best tool for keeping stress low and your project moving forward.
- Create a Detailed Budget: Go line by line and itemize every conceivable cost: materials, labor (even if it's your own), permits, and transport. Crucially, add a 15-20% contingency fund. Surprises always happen.
- Secure Your Funding: Line up your capital before you need it. Whether you're using savings, a personal loan, or one of the growing number of tiny home loans, have the money ready to go.
A well-researched budget is the most powerful tool you have. It empowers you to make smart trade-offs between different material grades and features, ensuring you can complete the project without financial strain.
Phase 3: Legal and Permitting
This is the bureaucratic part, and it’s non-negotiable. Getting everything squared away with your local authorities from the start will save you massive headaches down the road.
- Research Local Zoning: Head to your local planning department (or their website) and dig into the rules. Understand the specific ordinances for Accessory Dwelling Units (ADUs) or Tiny Houses on Wheels (THOWs) in your area.
- Confirm Building Codes: Find out which codes your project must adhere to. Will it be the International Residential Code (IRC) Appendix Q, or does your municipality have its own set of standards?
- Apply for All Necessary Permits: Get your applications for building, electrical, and plumbing permits submitted as early as possible. These processes can take weeks, sometimes months.
Phase 4: Construction
Here we go—the hands-on phase where your blueprints and permits turn into a physical structure.
- Site Preparation and Foundation: It all starts from the ground up. Prepare your land and install the foundation, whether you've chosen a concrete slab, piers, or a specialized trailer.
- Framing and Shell Construction: This is when it starts to look like a house. Raise the walls, set the roof trusses, and get the structure wrapped with sheathing, siding, and a roof to make it weatherproof. Install your windows and doors.
- Rough-In Utilities: Before any walls go up on the inside, it's time to run all your electrical wiring and plumbing lines through the framing. This is the "bones" of your home's systems.
- Interior and Exterior Finishes: With the guts of the house in place, you can insulate and hang drywall. Then comes the fun part: installing flooring, painting, adding cabinetry, and completing all the exterior siding and trim details.
Phase 5: Final Touches and Move-In
You're in the home stretch! This last phase is all about taking the structure from a "building" to a "home."
- Install Appliances and Fixtures: Get your refrigerator, cooktop, water heater, and HVAC system connected. Install all your light fixtures, faucets, and the toilet.
- Schedule Final Inspections: Once everything is installed, call in the inspectors. They'll need to sign off on the electrical, plumbing, and final build before you can legally live there.
- Furnish and Decorate: The moment you've been waiting for. Bring in your smart, multi-functional furniture, hang your art, and add the personal touches that truly make it yours. Welcome home.
Frequently Asked Questions
Diving into the world of tiny homes always brings up a few key questions. Here are some straightforward answers to the things people ask most about the 12×32 tiny house, based on years of experience in this space.
How Many People Can Comfortably Live Here?
A 12×32 tiny house, with its 384 square feet, is really the sweet spot for one or two people. For a solo dweller, it’s downright spacious. You'll have plenty of room to create distinct areas for living, sleeping, and even working from home without feeling like you're on top of everything.
For a couple, this size works beautifully as long as you're smart about the layout and get creative with storage. We’ve also seen it work for a small family with one child—usually with a loft—but it requires a serious commitment to minimalist living and being comfortable in each other's space.
What Are the Biggest Challenges of This Footprint?
The two classic tiny living puzzles you'll need to solve in a 12×32 are storage and privacy. To keep things from feeling cluttered, every single item you own needs a home. This means you have to think beyond standalone shelves and embrace clever built-ins and furniture that does double duty.
The core challenge isn't just about where to put your stuff. It's about designing a space that can transform with your day—feeling like a functional workspace in the afternoon and a relaxing living room in the evening, even in an open layout.
Finding personal space can also be tricky, especially if you don't have a fully separate bedroom. This is where thoughtful design comes in. Using furniture, rugs, or even simple partition screens to "zone" the space can create the mental separation you need for a little quiet time.
Can This Be a Permanent Legal Home?
Yes, a 12×32 tiny house can absolutely be a legal, permanent home. The real question isn't if it's possible, but how it's classified, which boils down to its foundation and local laws.
On a Foundation (ADU): If you build it on a permanent foundation (like a slab or concrete piers) and it meets the same building codes as a traditional house, it's often treated as a legal Accessory Dwelling Unit (ADU). This is the most straightforward path to full-time legal living.
On Wheels (THOW): A tiny house built on a trailer is typically classified as a Tiny House on Wheels (THOW) or, in some areas, simply an RV. This changes the game completely, as you'll face a different set of rules about where you can park and live long-term, which can be much more restrictive.
Honestly, the very first call you should make before you even start sketching floor plans is to your local zoning and planning department. They have the final say and can tell you exactly what's allowed in your specific area.
Explore more tiny home living, design, downsizing, building, and lifestyle resources.
- Tiny Homes for Rent in Wyoming: Wild West Getaways to Book
- Tiny Homes for Rent in Washington: Forest Escapes & Cozy Stays
- Tiny Homes for Rent in Utah: Red Rock Retreats to Book
- Tiny Homes for Rent in Oregon: Forest Retreats You’ll Love
- Tiny Homes for Rent in New Mexico: Desert Gems & Starry Skies
- Tiny Homes for Rent in Nevada: Desert Hideaways Worth Booking