How Do Tiny Homes Get Water and Electricity? A Comprehensive Guide
So, you’re curious about how tiny homes get their water and electricity, right? It’s a common question, especially if you’re thinking about downsizing or living a more independent lifestyle. Unlike traditional houses that are usually hooked up to city services, tiny homes often need creative solutions. Whether you’re aiming for full off-grid living or just want to understand the options, figuring out water and power is a big part of the puzzle. Let’s break down how these small spaces manage these essential utilities.
Key Takeaways
- Tiny homes can connect to municipal water lines like regular houses if available, or opt for off-grid solutions like rainwater harvesting or wells.
- Managing water inside involves efficient plumbing, often using space-saving tankless water heaters, and considering greywater recycling.
- Electricity can come from grid hookups (like RV connections) or renewable sources such as solar panels, often paired with battery storage for off-grid setups.
- Planning is key for tiny home electrical systems, involving calculating power needs, ensuring safe wiring, and meeting local codes.
- Reliable water quality is achieved through filtration, and water conservation is practiced using low-flow fixtures and managing greywater.
Connecting Tiny Homes to Water Sources
Getting water to your tiny house is a big deal, right? Without it, you’re basically just camping, and nobody wants that long-term. Luckily, there are a few ways to get water flowing, whether you’re hooked up to the grid or living way out in the sticks.
Using City or Municipal Water Lines
If your tiny house is parked on a lot with access to city water, you’re in luck. Connecting to a municipal water line is pretty much the same process as hooking up a regular house. You’ll need to tap into the main water supply and run a line to your tiny home. This usually involves getting permits and hiring a plumber to make sure everything is up to code and won’t leak. It’s the most straightforward option if it’s available to you, giving you a reliable and constant water supply without much fuss.
Setting Up Rainwater Harvesting Systems
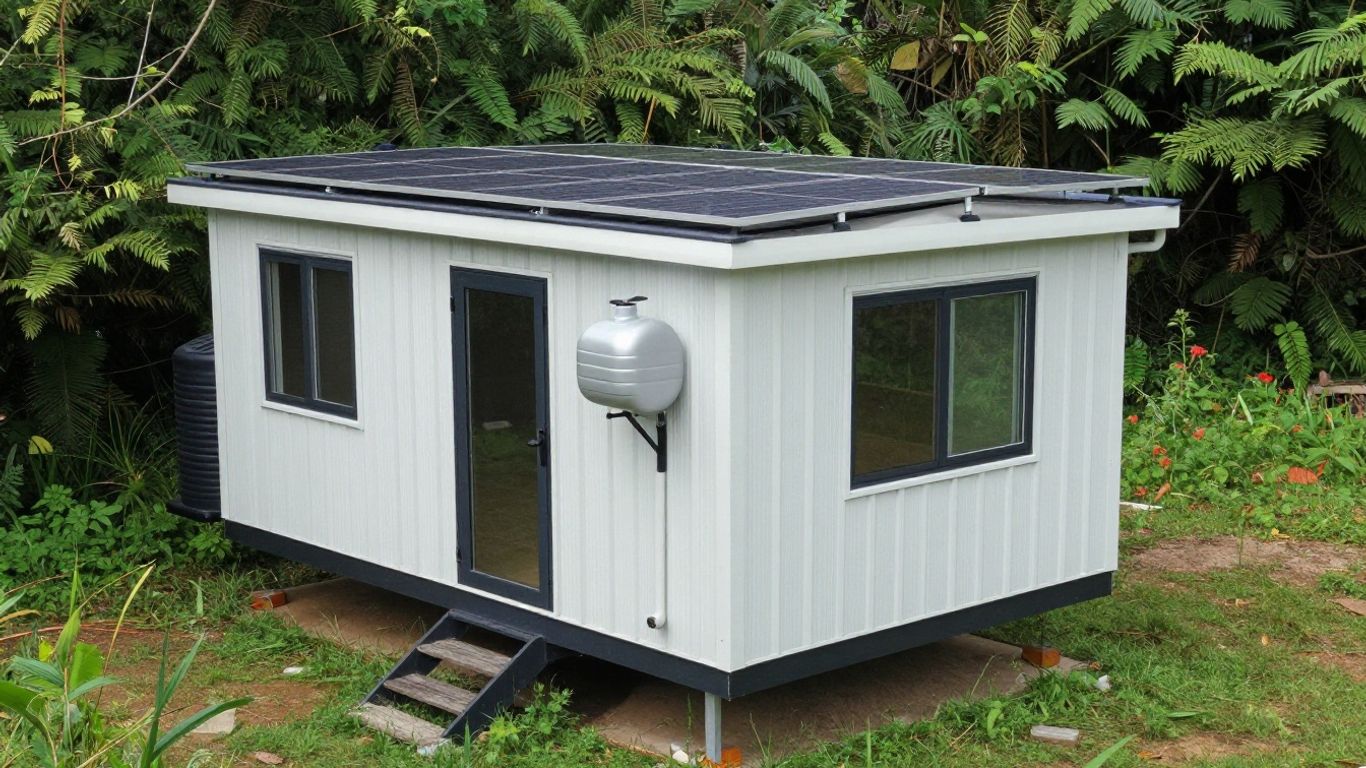
For those who are off-grid or just want to be more self-sufficient, rainwater harvesting is a popular choice. This involves collecting rain that falls on your roof and storing it in tanks. You’ll need a system to catch the water, pipes to direct it to storage, and tanks to hold it. Don’t forget about filtration! You’ll want to clean that water up before you drink it or use it for cooking. It’s a great way to use a natural resource, but it does mean you’re dependent on the weather.
- Roof Catchment Area: The size and material of your roof matter for how much water you can collect.
- Gutters and Downspouts: These direct the water from your roof to your storage system.
- Storage Tanks: You’ll need tanks large enough to hold a good supply, especially if you don’t get rain often.
- Filtration and Purification: Essential steps to make the water safe for use.
Installing a Well for Off-Grid Water
If you’re really off the grid and don’t have access to city water or consistent rainfall, drilling a well might be your best bet. This is a more involved process, as you’ll need to find a reliable water source underground and then use a pump to bring it to your house. It can be expensive upfront, and you’ll need to test the water quality regularly to make sure it’s safe. A well gives you a consistent water source, but it requires a significant investment and ongoing maintenance.
Drilling a well is a serious undertaking. It requires professional assessment to locate a suitable water source and specialized equipment for drilling. The depth and yield of the well will significantly impact the cost and the reliability of your water supply.
Managing Water Inside a Tiny Home
So, you’ve got your water source sorted, but what happens once it’s actually in your tiny house? This is where things get interesting, and honestly, pretty important for day-to-day living. You don’t want to end up with a fancy, expensive camping setup, right?
Designing Efficient Plumbing Systems
When you’re working with limited space, every inch counts, and that includes your plumbing. The goal here is to create a system that’s not only functional but also minimizes water waste and is easy to maintain. Think about running your hot and cold water lines strategically to reduce the distance water has to travel, which means less waiting for hot water and less water going down the drain before it even gets warm. It’s also smart to group your water-using appliances and fixtures together. This can simplify the pipe layout, potentially saving on materials and making future repairs a lot less of a headache. Consider using PEX tubing instead of copper; it’s more flexible, easier to install in tight spots, and often more affordable.
Heating Water with Tankless Water Heaters
Forget those bulky tanks that take up valuable floor space and constantly sip energy to keep water hot. For tiny homes, tankless water heaters are usually the way to go. These units heat water on demand, meaning they only use energy when you actually turn on a faucet or shower. This is a huge space and energy saver. You’ll find them powered by propane or electricity. Propane models often have a higher flow rate, which can be better if you have multiple people needing hot water simultaneously, while electric ones can be simpler if you have a robust electrical system. Just make sure the unit you choose can keep up with your household’s hot water needs – sizing it correctly is key.
Using Greywater Recycling for Irrigation
This is a really smart way to conserve water, especially if you have a garden or plants you want to keep happy. Greywater is basically the water from your sinks (kitchen sink water might need extra filtering depending on what you wash down it), showers, and washing machines. It’s not sewage, so it’s generally safe to reuse for things like watering your plants or even flushing toilets (though that requires a more complex system). The trick is to use biodegradable soaps and detergents. This way, you’re not introducing harsh chemicals into your soil or plants. Setting up a simple greywater system usually involves diverting the water from your drains to a storage tank or directly to your irrigation system, often with a basic filter to catch larger debris. It’s a win-win: you save water and give your garden a drink.
Managing water inside a tiny home is all about smart design and efficient use. From how the pipes are laid out to how you heat your water and reuse what you can, every decision makes a difference in comfort and sustainability.
Supplying Electricity to Tiny Homes
Getting power to your tiny house is a big question, and honestly, it’s not a one-size-fits-all answer. It really depends on where you’re parking it and how you plan to live. Are you plugging into a friend’s backyard, hitting the road full-time, or aiming for that ultimate off-grid dream? Each scenario has its own way of getting the lights on.
Grid Hookups and RV Electrical Connections
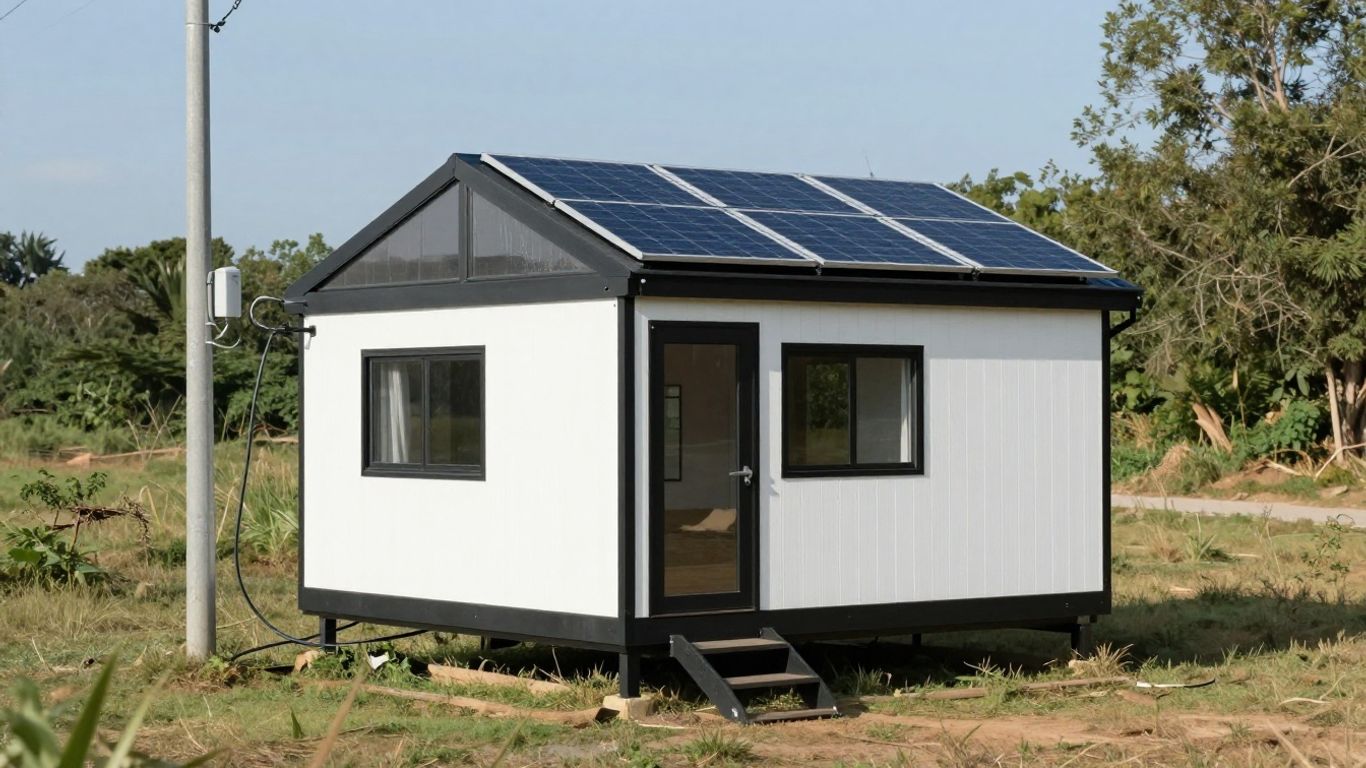
This is probably the most straightforward way to get power, especially if your tiny home is parked semi-permanently or you travel to established campgrounds. Think of it like plugging in any other appliance, but on a larger scale. You’ll typically have an inlet on the outside of your tiny house, which connects to a power source. For mobile units, this often looks like an RV-style hookup, using a robust plug and socket system designed for higher amperage. Once the power comes in, it goes through a breaker panel inside your tiny home, just like in a regular house, to distribute it safely to your outlets and lights. It’s a reliable method, but it means you’re dependent on having access to the grid.
- Standard Outlet Hookup: For tiny homes in a backyard or on a foundation, you might run a dedicated line from the main house or a utility pole. This is more permanent and requires proper conduit and wiring.
- RV-Style Hookup: Common for tiny homes on wheels (THOWs) or those visiting RV parks. Uses a specific plug (like a 30-amp or 50-amp twist-lock) that connects to a pedestal or generator.
- Shore Power Inlet: A general term for any external connection point that allows your tiny house to draw power from an external source, whether it’s the grid or a generator.
When using grid hookups, it’s vital to have a properly installed breaker panel. This panel protects your tiny home’s electrical system from overloads and short circuits, preventing damage to appliances and reducing fire risks. It’s the gatekeeper for all the electricity entering your home.
Installing Solar Power and Battery Systems
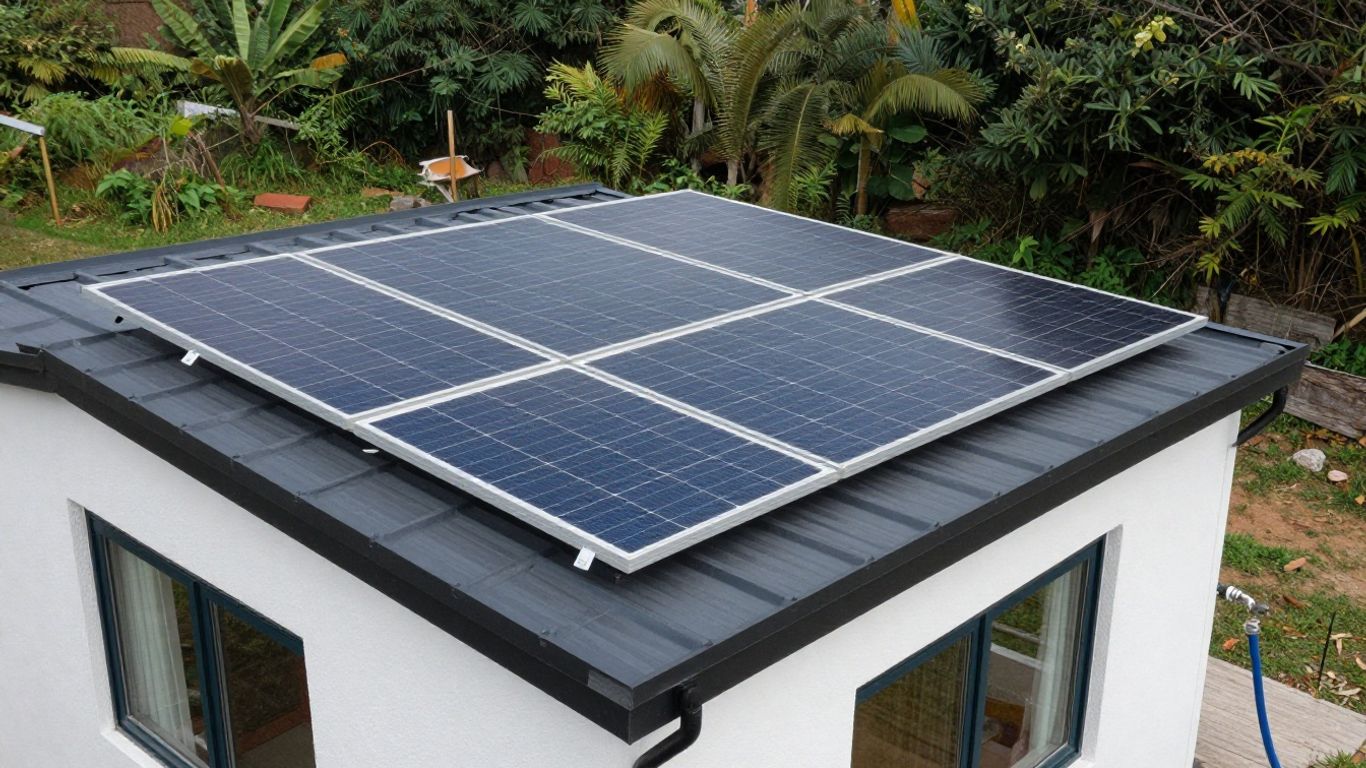
Going solar is a popular choice for tiny homes, especially for those seeking independence from the grid. It’s a system that captures sunlight and converts it into usable electricity. The basic setup involves photovoltaic (PV) panels, which collect the sun’s energy. This energy is then usually converted from DC (direct current) to AC (alternating current) power by an inverter, which is what most of your appliances use. Because the sun doesn’t always shine, you’ll need batteries to store the energy collected during the day for use at night or on cloudy days. The size of your solar array and battery bank will depend heavily on your energy consumption and your location’s sunlight availability. You can find some great portable power stations that can be integrated into these systems, offering flexibility for various needs.
- Solar Panels: The collectors of sunlight. Placement is key – they need good sun exposure, ideally facing south in the Northern Hemisphere.
- Charge Controller: Manages the flow of electricity from the panels to the batteries, preventing overcharging.
- Battery Bank: Stores the DC electricity generated by the panels.
- Inverter: Converts the stored DC power into AC power for your appliances.
Backup Power with Generators and Wind Turbines
Even with a solid solar setup, there might be times when you need a little extra juice. This is where backup power comes in. Generators are a common choice; they run on fuel (like propane or gasoline) and can provide a significant amount of power when your solar panels aren’t producing enough, or your batteries are low. They’re great for charging batteries quickly or running high-demand appliances for short periods. Wind turbines are another option, especially in areas with consistent wind. They work similarly to solar panels by generating electricity from a natural resource. Combining these with solar and battery storage can create a robust, multi-layered power system that keeps you comfortable, no matter the weather.
- Generators: Provide on-demand power but require fuel and produce noise and emissions.
- Wind Turbines: Harness wind energy; effectiveness depends on consistent wind speeds.
- Hybrid Systems: Combining solar, wind, and battery storage offers the most reliable off-grid power, reducing reliance on any single source.
Planning a Tiny House Electrical System
Figuring out the electricity for your tiny house is a big step, and it’s smart to plan it out before you start building or buying. It’s not just about plugging things in; it’s about making sure your system is safe, reliable, and meets your needs, whether you’re hooked up to the grid or living the off-grid dream.
Calculating Power Usage and Needs
Before you buy a single wire or solar panel, you need to know how much power you’ll actually use. This means making a list of every appliance, light, and gadget you plan to have in your tiny home. Think about how often you’ll use them and for how long. For example, a mini-fridge uses less power than a full-sized one, and a laptop uses way less than a space heater. You’ll want to add up the wattage of all your devices. Then, you can figure out your daily energy needs in watt-hours (Wh) or kilowatt-hours (kWh).
Here’s a quick look at some common tiny house power draws:
| Appliance/Device | Typical Wattage | Daily Usage (Hours) | Daily Wh |
|---|---|---|---|
| LED Lights (x5) | 25W | 4 | 100 Wh |
| Laptop | 60W | 3 | 180 Wh |
| Phone Charger | 15W | 2 | 30 Wh |
| Mini-Fridge | 60W | 24 | 1440 Wh |
| Toaster Oven | 1200W | 0.5 | 600 Wh |
| Total Daily Wh | 2350 Wh |
This is just an example, of course. Your numbers will change based on what you use. For a 120V system, you’d divide your total daily Wh by 120 to get your amp-hour needs. For a 240V system, you’d divide by 240. This helps you size your wires, breakers, and battery bank correctly.
Don’t guess your power needs. Take the time to list everything out and estimate usage. It’s better to have a slightly oversized system than one that constantly struggles to keep up. This planning prevents headaches down the road.
Wiring and Safety Considerations
Safety is paramount when dealing with electricity, especially in a small, often wood-framed space like a tiny house. Proper wiring prevents fires and electrical shocks. This involves using the correct gauge wire for the expected load, installing appropriate circuit breakers or fuses to protect each circuit, and making sure everything is grounded. Grounding is super important; it provides a safe path for electricity to flow to the earth if something goes wrong, preventing dangerous voltage buildup.
Key safety points include:
- Proper Grounding: Every outlet, appliance, and metal component should be properly grounded. This is non-negotiable.
- Circuit Protection: Use breakers or fuses sized correctly for each circuit. This stops wires from overheating if there’s a fault.
- Wire Gauge: Using wire that’s too thin for the amperage can cause it to overheat and is a major fire risk.
- Secure Connections: All wire connections must be secure and protected within junction boxes. Loose connections can arc and start fires.
- Ventilation: If you have components like inverters or battery banks, they often need good airflow to prevent overheating.
If you’re not experienced with electrical work, it’s highly recommended to have a qualified electrician review your plans or do the installation. They understand the codes and best practices to keep your home safe.
Meeting Local Code and Permit Requirements
Depending on where you’re building your tiny house and how it’s classified (e.g., on wheels, on a foundation, an accessory dwelling unit), you might need permits for electrical work. Local building codes exist for a reason – they are designed to ensure safety and prevent hazards. Even if permits aren’t strictly required in your area, following standard electrical practices is always a good idea.
- Check with Authorities: Before you start, contact your local building department. Ask about requirements for electrical permits, inspections, and any specific codes that apply to tiny homes or RVs.
- Understand RV vs. House Codes: If your tiny house is on wheels and intended to be mobile, it might fall under RV electrical standards, which can differ from standard residential codes.
- Inspection Process: If permits are required, you’ll likely need inspections at various stages of the electrical installation. This is a good way to catch any potential issues early.
- Insurance and Resale: Having work done to code and passing inspections can be important for insurance purposes and if you ever decide to sell your tiny home.
Ensuring Reliable Water Quality and Conservation
Getting water into your tiny house is one thing, but making sure it’s clean and that you’re not using too much is another. It’s easy to forget about water when you’re used to turning on a tap, but when you’re managing your own supply, every drop counts.
Filtration Options for Clean Drinking Water
If you’re relying on rainwater or a well, filtering your water is a big deal. You don’t want to be drinking anything that could make you sick. There are a few layers to this, and it’s good to have a system that handles different issues.
- Sediment Filters: These are usually the first line of defense. They catch bigger stuff like dirt, sand, and rust. Think of them like a sieve for your water.
- Activated Carbon Filters: These are great for improving taste and odor. They also help remove chemicals like chlorine and some pesticides.
- UV Purifiers: For killing off any nasty bacteria or viruses that might have snuck through. A UV light zaps them, making the water safe to drink.
Setting up a multi-stage filtration system is the best way to get truly clean drinking water, especially if your source isn’t a municipal line. It might seem like a lot, but your health is worth it.
Low-Flow Fixtures to Reduce Consumption
Using less water is just smart, especially if you’re collecting it yourself. Swapping out old fixtures for low-flow versions is a pretty simple upgrade that makes a big difference over time. You’d be surprised how much water a standard showerhead or faucet can use!
Here’s a quick look at what you can save:
| Fixture | Standard Flow Rate (GPM) | Low-Flow Rate (GPM) | Water Saved Per Minute (Gallons) |
|---|---|---|---|
| Showerhead | 2.5 | 1.5 | 1.0 |
| Faucet Aerator | 2.2 | 1.0 | 1.2 |
| Toilet | 1.6 (GPF) | 1.28 (GPF) | 0.32 (per flush) |
Seasonal Maintenance of Water Systems
Tiny house water systems, especially those used off-grid, need a little TLC throughout the year. What you do in the summer might be different from what you need to do in the winter.
- Spring Check-up: After winter, check your tanks and pipes for any damage from freezing. Clean out any sediment that might have built up.
- Summer Use: Keep an eye on your water levels, especially if it’s dry. Clean your rain gutters and filters regularly to keep debris out of your collection system.
- Fall Preparation: Before the cold hits, make sure to properly winterize any outdoor pipes or tanks to prevent them from freezing and bursting. This might involve draining them or adding insulation.
- Winter Monitoring: Even in winter, check your system periodically. If you’re using a well, ensure the pump is working correctly. For rainwater, you might not be collecting much, but you still need to check the stored water quality.
Managing Waste and Sewage in Tiny Houses
Dealing with waste and sewage is a big part of tiny house living, and honestly, it’s not always the most glamorous topic. But it’s super important to get right, whether you’re hooked up to city services or living completely off the grid. You don’t want to end up with a smelly situation or, worse, environmental problems.
Installing Composting and Waterless Toilets
When you’re not connected to a municipal sewer system, a composting toilet is often the go-to solution. These aren’t your grandma’s outhouses, though! Modern composting toilets are designed to be pretty user-friendly and, believe it or not, odor-free if managed correctly. They work by separating liquids and solids, and using aerobic decomposition to break down waste into a usable compost. It sounds a bit wild, but it’s a really effective way to handle human waste without water.
- Types of Composting Toilets:
- Self-contained units: These have a built-in composting chamber.
- Split systems: These have the toilet bowl separate from the composting unit, which can be located elsewhere.
- Incinerating toilets: These use heat to reduce waste to ash, but they require more energy.
The key is regular maintenance, like emptying the compost bin, but it’s a small price to pay for water-free waste management.
Dealing with Greywater Safely
Greywater is basically the wastewater from your sinks, showers, and washing machines – anything that isn’t from the toilet (that’s blackwater). It’s not as contaminated as blackwater, which means it can often be reused, especially for irrigation. Using biodegradable soaps and detergents is a must if you plan to recycle your greywater. If you’re not recycling it, you still need to dispose of it properly, often through a specific greywater system or by connecting to a septic or sewer line.
- Greywater Sources:
- Bathroom sinks
- Showers and bathtubs
- Washing machines
- Kitchen sinks (sometimes, depending on local regulations and the type of food waste)
Properly managing greywater prevents soil and water contamination, and reusing it can significantly cut down on your overall water usage.
Planning for Blackwater Disposal
Blackwater is the wastewater from your toilet. If you’re connected to a municipal sewer, this is usually straightforward – you just hook up. For off-grid living, options include a septic system or a holding tank. A septic system is a more permanent solution where waste is treated underground. Holding tanks, on the other hand, need to be regularly pumped out by a service. The choice really depends on your location, local regulations, and how often you’re willing to have your tank serviced.
Adapting Tiny Homes for Off-Grid Living
Going off-grid with your tiny house means you’re aiming for a life of independence, relying on your own systems for power, water, and waste. It’s a big step, but totally doable with the right setup. Think of it as building your own little self-sufficient world, wherever you decide to park it.
Combining Solar, Wind, and Hydro Solutions
Most off-grid tiny homes lean heavily on solar power, and for good reason. Sunlight is pretty reliable in most places, and panels have gotten way more efficient. But relying on just one source can be risky. What happens on a cloudy week? That’s where other renewables come in. If you’re near a stream or river, a micro-hydro system can provide consistent power, day and night. Wind turbines are another option, especially in open areas with steady breezes. The real magic happens when you combine these. A hybrid system, like solar panels supplemented by a small wind turbine, gives you a much more stable and reliable power supply. You’re not putting all your energy eggs in one basket, so to speak.
- Solar Panels: Great for sunny days, easy to install.
- Wind Turbines: Good for consistent breezes, can generate power 24/7.
- Micro-Hydro: Excellent for consistent power if you have moving water nearby.
Selecting Sustainable Materials and Appliances
When you’re off-grid, every bit of energy counts. This means being smart about what you put into your tiny home. Look for appliances that are super energy-efficient. Things like propane stoves and refrigerators often use less electricity than their full electric counterparts. When it comes to building materials, think about what’s durable and has a low environmental impact. Reclaimed wood, recycled metal roofing, and natural insulation like wool or cork can make a big difference. It’s all about reducing your footprint and making your home work with nature, not against it.
Choosing materials and appliances that sip energy, rather than guzzle it, is key to maintaining your independence and reducing the strain on your power systems. This thoughtful selection process extends the life of your batteries and generators, and ultimately, your comfort.
Balancing Energy Independence and Comfort
Living off-grid doesn’t mean you have to rough it. The goal is to find a balance. You want the freedom of not being tied to the grid, but you also want to be comfortable. This often means making conscious choices about your energy use. Maybe you run your high-draw appliances during peak sun hours or when the wind is blowing strong. It might mean a slightly smaller hot water tank or being mindful of how long you run the microwave. It’s about understanding your energy budget and living within it, so you always have enough power for what you truly need. The sweet spot is achieving self-sufficiency without sacrificing the modern conveniences that make a house a home.
Bringing It All Together: Powering and Watering Your Tiny Home
So, we’ve looked at how tiny homes can get water and electricity, and it turns out there are quite a few ways to do it. Whether you’re plugging into the grid like a regular house, setting up solar panels for off-grid living, or collecting rainwater, there’s a solution for most situations. It might seem complicated at first, especially with all the wiring and plumbing involved, but with a bit of planning and the right setup, you can absolutely have a comfortable and functional tiny home. It’s all about figuring out what works best for your location and your lifestyle.
Frequently Asked Questions
How do tiny homes get water if they aren’t connected to city lines?
Tiny homes can get water in a few ways if they aren’t hooked up to city water. Many people collect rainwater by setting up special systems to catch and store it. Others might dig a well on their property to access underground water. For some, especially if they’re moving around, they might bring water with them in tanks.
What’s the best way to heat water in a tiny house?
For tiny homes, tankless water heaters are usually the top choice. They’re small, don’t take up much space like a big tank heater, and they heat water only when you need it. This makes them super efficient and saves energy, which is great for small spaces.
Can a tiny house run entirely on solar power?
Yes, many tiny houses can run solely on solar power! It works best if you have good sunlight, enough battery storage to save power for cloudy days or nights, and if you use energy-saving appliances. Some people also use a backup generator just in case.
What is greywater, and how is it used in tiny homes?
Greywater is water from sinks, showers, and washing machines that isn’t from the toilet. It’s usually clean enough to be reused for things like watering plants in a garden or flushing toilets, as long as you use eco-friendly soaps. This helps save a lot of water.
How do tiny homes handle sewage if they don’t have a sewer connection?
Tiny homes often use composting toilets, which turn waste into compost that can be used in gardens. They don’t need water to flush. For other wastewater, like from sinks and showers (greywater), it’s managed separately, sometimes through recycling or specific disposal systems.
Do I need special permits for electrical work in a tiny house?
Often, yes. Permits and inspections are usually required, especially if your tiny house is on a foundation or connected to the main power grid. These rules help make sure the electrical setup is safe and meets local standards. It’s always best to check with your local building office first.
Explore more tiny home living, design, downsizing, building, and lifestyle resources.
- Tiny Homes for Rent in Wyoming: Wild West Getaways to Book
- Tiny Homes for Rent in Washington: Forest Escapes & Cozy Stays
- Tiny Homes for Rent in Utah: Red Rock Retreats to Book
- Tiny Homes for Rent in Oregon: Forest Retreats You’ll Love
- Tiny Homes for Rent in New Mexico: Desert Gems & Starry Skies
- Tiny Homes for Rent in Nevada: Desert Hideaways Worth Booking